Learn It

HOW TO CONTOUR FOR BEGINNERS: PRACTICE MAKES PERFECT SERIES

Welcome to our practice makes perfect series where our Head Makeup Artist Mel Barrese walks us through all of her tips and tricks to applying the makeup basics as life returns to some semblance of normalcy. First up: how to contour.

When we picture contouring, we think of sun-kissed and perfectly sculpted skin with a subtle glow in all the right places. 

It’s a common question we’ve all asked: should I contour my face? When contour is done right, this IRL version of a filter can give you defined cheekbones and a chiselled jawline.

Love it or hate it – contouring is a trend that’s here to stay and can be the secret to taking your makeup look to the next level.  

Has it been a while since your used your sculpting tools? One step beyond the natural makeup routine, this everyday contour checks all the boxes to achieve sculpted skin that will leave you feeling confident. 

STEP ONE: PREP THE SKIN 

Start by prepping the skin: apply Hydra Veil Primer to hydrate and plump for makeup application. When using Hydra Veil, focus on the centre of the face and apply outwards, specifically around the T-zone area. Hydra Veil reduces any fine lines and pores and creates the ideal base for your foundation, concealer and contour.  

STEP TWO: SCULPT & DEFINE 

A key tip to remember is cool tones are best when contouring. It can be tempting to use bronzers with warmer undertones for a sun-kissed tan rather than a shadow, but our Gel Sculpt Contour Stick is the perfect grey undertone to give the appearance of a sculpted shadow. While it can look dark inside the bullet, it appears quite translucent on the skin and can be built to the level of intensity you want. 

makeup artist applying contour stick
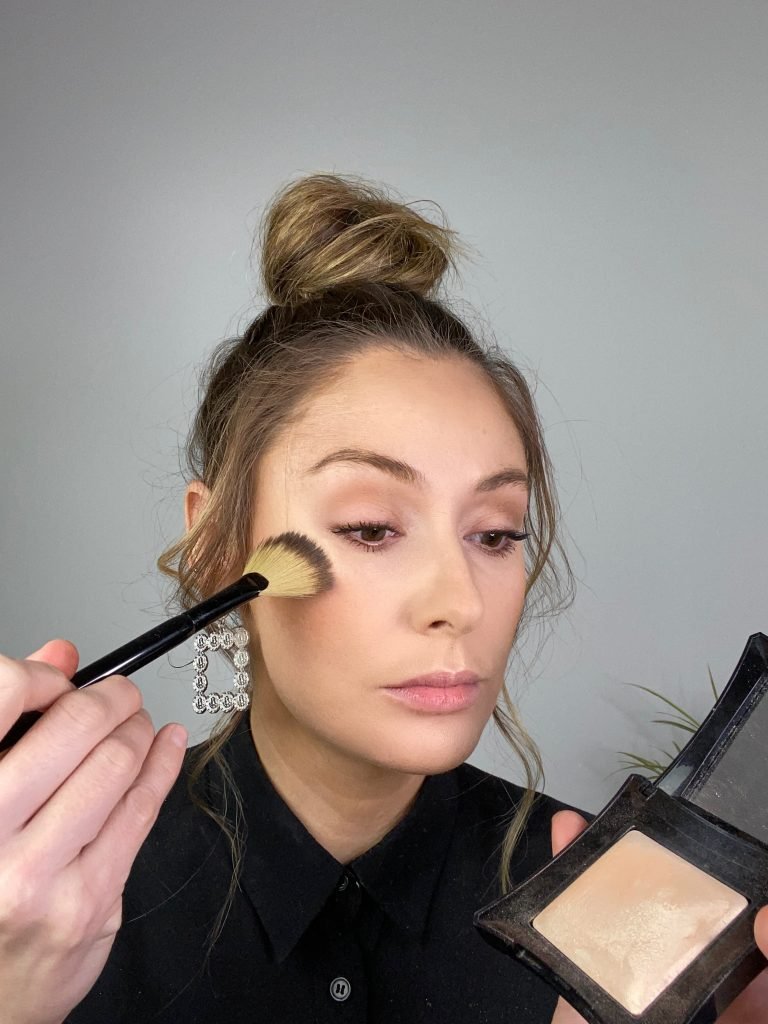
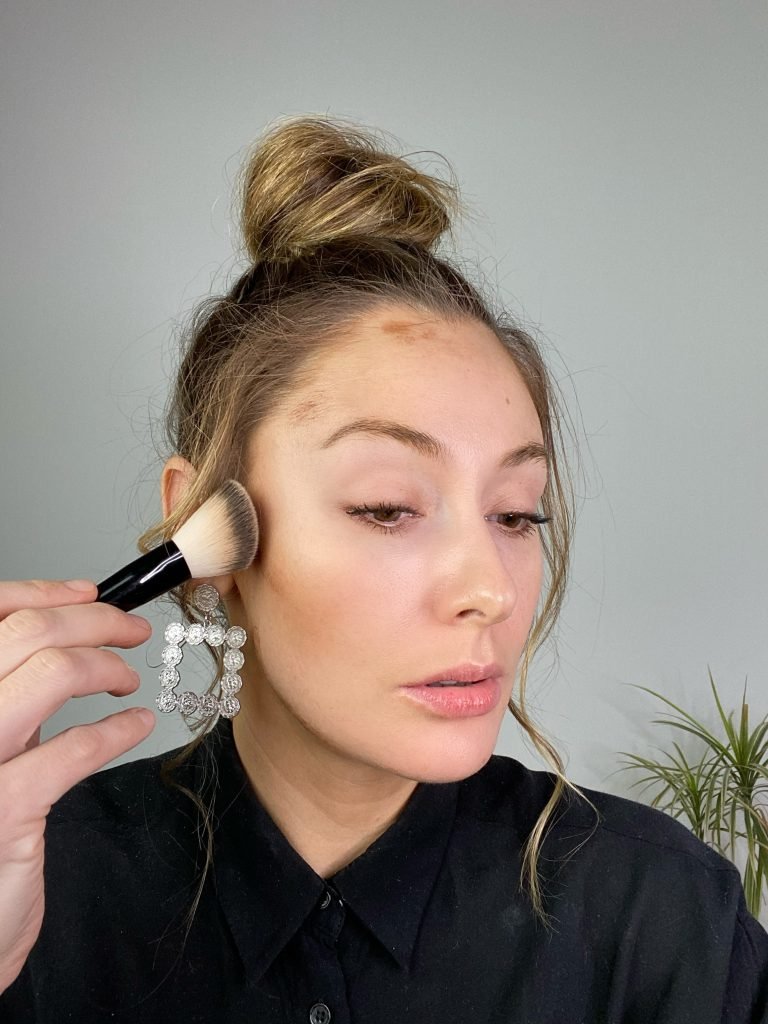
For Gel Sculpt, you can apply it by using a brush on the product or applying directly from the bullet itself onto the skin. It’s all about how you can define your bone structure – the cheekbones are the key areas to focus on. 

Rather than going all the way down the cheek – which can make you look a bit sunken – you should go from the cheekbone to a quarter of the way down the cheek. Apply the product directly and take a Contour Brush to blend it out by using circular back and forth motions. 

You can also contour your jawline. Apply the product directly along the jawline and blend. Don’t forget to take it down your neck to avoid harsh lines. Go lightly along the chin, building the depth to achieve the shape you want. 

To sculpt your forehead, use Gel Sculpt and gently draw into the hairline, along the forehead and temples, blending out.  You can also use Gel Sculpt to contour around the eyes and the nose. Using a small concealer brush, load the brush with Gel Sculpt, and apply it directly to the skin. 

To contour the eye area, pat the brush into the crease and blend it back and forth as if you were blending eyeshadow into your crease. This is an excellent way of getting your eyes to stand out and add definition for a more natural look.

Using the same method to contour the nose. Add product to your brush up and, with a light touch, draw along the sides of your nose, blending it out. Then add a light pat of Gel Sculpt to the tip of your nose and the nostrils.  

STEP THREE: HIGHLIGHT & CORRECT  

Makeup artist applying concealer
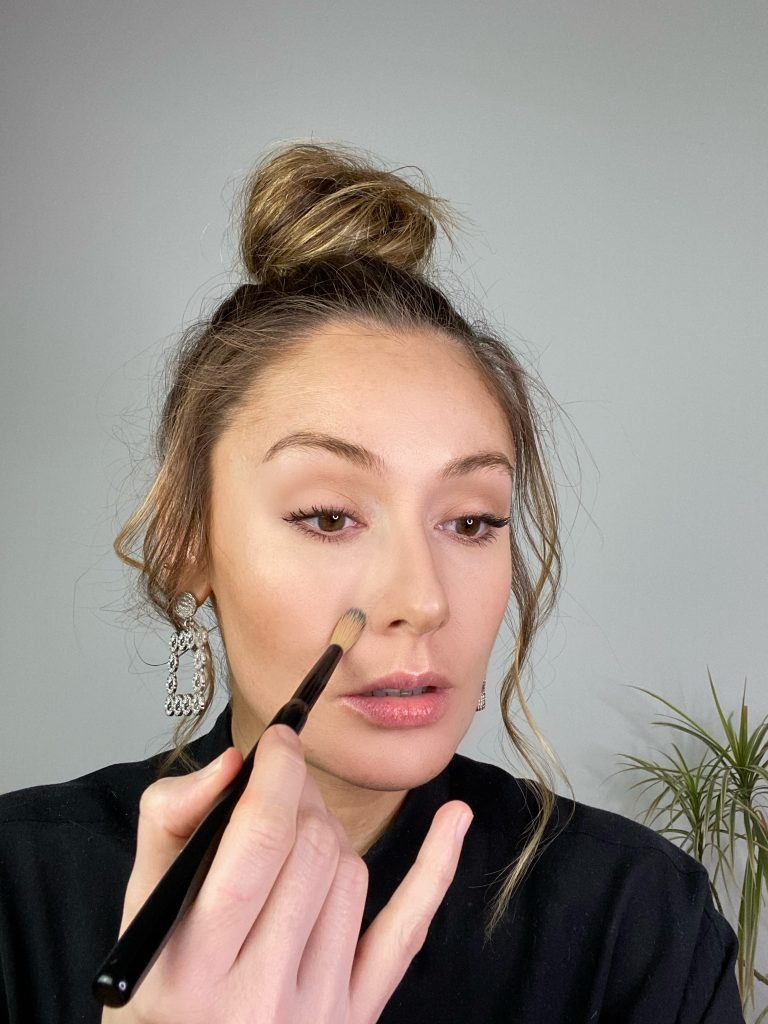
With the face contoured, it’s time to highlight the base and add depth. Using the Skin Base Concealer Pen in a shade lighter than you usually use. Apply with our Round Concealer Brush. For an ultra contour, brighten the key areas below.

Apply Skin Base Concealer Pen around the nose and under the eyes, creating a triangle shape to open the eye area. This will add a sharp contrast between the concealer and shadow of the contour.  

Other key areas to apply concealer are on the chin and the forehead, creating a slight star shape to lighten the front of the face and add more structure. Don’t forget to blend it outward. 

STEP FOUR: PERFECT THE SKIN 

Now it’s time to perfect the skin. Using Skin Base Foundation with our new Foundation Brush, lightly brush a small amount of product over your skin. Avoid applying too much foundation: using an almost-sheer layer to perfect the skin so your contour still comes through. 

A pro tip for contouring: the hollows of the cheeks are a major focus point. Don’t apply the foundation over this blended line, simply apply under it, lightly buffing the skin for contrast. Continue to apply foundation to achieve the coverage you want. 

STEP FIVE: SET & POWDER  

Using Pressed Powder with our Powder Brush, mattify and set your makeup. Focus on the centre of your face, specifically under your eyes and around the T-zone.  

To add warmth to the face, use our Powder Foundation with a warm undertone. Apply with our Powder Brush, tapping off the excess beforehand. Then lightly go over your contour and skin. You can apply this to the temples, forehead and along the jawline. 

STEP SIX: HIGHLIGHT, BLUSH & SPRAY 

Makeup artist applying highlighter

Use our Beyond Highlighter in the shade OMG with our Highlighter Fan Brush. Apply to the high points of the face: the tops of cheekbones, arch of the eyebrows, the Cupid’s bow and the tip of the nose.  

One of the last steps: add blusher. Blusher is a crucial step when contouring, as all the products used to this point are skin-tone shades. Blusher adds more warmth and color to the face, taking it the next step past a perfected skin look.   

The orangey tone of our Powder Blusher in the shade Excite will give your skin a lift. Team it with our Blusher Brush, tap off the excess and lightly flick the brush up across the apples of the cheeks in an outward motion. As well as the cheeks, you can lightly apply blush to the eyes and the forehead to add warmth.  

Finish this look using your favorite shade of lipstick, then set it using our Hydra Setting Spray to lock the look in place. 


Ana Joyking

Ana Joyking

Writer and expert

Hi there! My name is Ana and I love all things makeup. I have had a passion for writing for a long time and started my career in TV , Radio and music journalism, working on some really cool TV shows, festivals and interviewing cool bands. Now I get to write about all things make up from the help tips and tricks to the weird and wonderful, there is no limit to who you can be with the power of makeup.