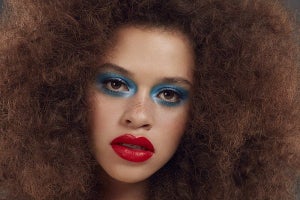
Scraped back hair, a dewy complexion, and balmy, plump lips- the clean makeup look really came to take over. Now sitting firmly as a go-to for a pulled-together glow-up, it's hard to remember what everyday makeup looked like before. However, although the clean makeup look has an effortless, simplistic finish, you should never judge a book by its cover. In fact, mastering the clean makeup look is an art that requires attention to detail, the right tools, and nine times out of ten, a natural makeup tutorial.
For this, we have you covered. Keep reading for our natural makeup tutorial to achieve the clean makeup look of your dreams.
How to apply foundation so it looks natural
To begin, start with the base. One of the most frequently asked questions in the make-up world is how to apply foundation so it looks natural, smooth, and sits almost like a second skin.
Step One: Blur the base
The answer to this begins with a primer. For a clean makeup look, we want to work with a base that is both smooth and dewy, so use a pea-sized amount of the Illamasqua Hydra Veil Primer on the fingers, focusing on the T-zone and blending outwards. This will help to remove any unwanted texture and decrease the visibility of fine lines.
Step Two: Go lightweight and be exact
Once the base has been set, the way how to apply foundation so it looks natural is largely centered on the foundation itself. Choose one which is ultra-lightweight and varies in shades. The Illamasqua Beyond Foundation works to provide an illuminated, glass-skin finish with 25 shades to choose from. What's more, you can take our test for your beyond foundation shade to not only identify your color category, but your undertone and depth- a more precise match of your natural skin tone.
Step Three: Dot and blend
A Stippling Brush has two sets of bristles. The long set transfers the foundation to the skin while the short, dense bristles push it into the skin. These two bristle types work together to apply the foundation so it looks natural. Squeeze the product onto the back of your hand, but only use a small amount of product (about the size of a 10p coin) and focus on the blending. Dab the brush in and lightly dot it around the center of the face and with quick, small circles, work your way outwards towards the edges of the face for a sheer finish.
For more tips on how to apply foundation, take a look at our guide!
Step Four: Brighten the under-eyes
The clean makeup look is all about looking like you regularly get eight hours of sleep. As we all know, this is easier said than done. So a key part of this natural makeup tutorial is to brighten the under eyes with the Skin Base Lift Concealer. Concentrate the product on the inner corner and then blend very lightly under the rest of the eye or wherever you need extra coverage. Use small, upwards strokes with a round concealer brush to instantly lift the eye and achieve that well-rested glow.
Step Five: Set everything into place
The final way how to apply makeup to look natural is to seal it into place. Dab some translucent loose powder under the eyes to lock the concealer in and spritz the Illamasqua Hydra Setting Spray onto the face for a soft, healthy sheen to the skin.
How to create natural-looking eyebrows
Following a dewy, flawless base, natural-looking eyebrows are the next most essential part of this look. Unfortunately, not all of us have been blessed with thick, strong brows that frame the face. Therefore, we're going to simply create natural-looking eyebrows instead.
Begin by brushing them upwards with a spoolie brush to straighten the hairs and identify the gaps that need filling in.
Following that, dip the Brow Definer Brush into the Precision Brow Gel and use small, upwards strokes to draw fine hairs through your natural brow.
Finish with a coating of the Brow and Lash Gel to set the brows into place, frame the face, and give that laminated brow effect that pairs perfectly with the clean makeup look.
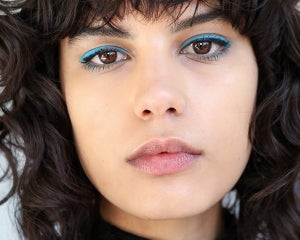
How to do a soft natural eye makeup look
One perk that comes with the clean makeup look is that the time-consuming eyeshadow contouring is left to one side. Instead, a soft, natural eye makeup look works best and is thankfully a lot less effort. What works well here is to simply use the bronzer you would normally use to add some warmth to your cheeks. For example, dust the Illamasqua Colour Correcting Bronzer into the crease of the eye socket for a soft, natural eye makeup look with a hint of contour.
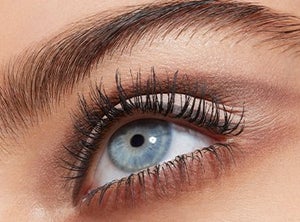
Gently curl the lashes and apply a coat of Infinite Masquara. Rub the brush horizontally at the root of the lash to coat the bottom of the base for a full-eye look, then start to build up the product through the lengths of your lashes, ensuring you comb out for a fluffy lash look with zero clumps. For this natural look, we're going to skip the bottom lashes for a squeaky clean finish.
How to find your 'My Lips But Better' Lipstick shade
Last but not least, we have a natural, balmy tint on the lips. In other words, the 'my lips but better' shade. For this, we would recommend the Hydra Lip Tints. An easy to wear, hydrated, and glossy lip look, the Hydra Tints can be simply applied straight from the bullet and swiped across the lips to instantly achieve that 'my lips but better' finish. You can even pat this product onto the apples of your cheeks for a soft blush!
To conclude, the clean makeup look has been welcomed with open arms into the makeup world and luckily, it is one that is easily achievable. Instead of transforming your natural look, enhance your natural beauty and give the clean makeup look a go!
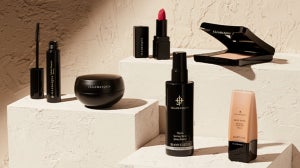
Shop This Post: