We want to show you how to make the most of your perfected pout – just in time for Valentine’s Day. While we know it’s highly likely this celebration will happen virtually, a strong red lip is just the statement to make for the big day.
Our Director of Artistry Pablo Rodriguez does a step-by-step tutorial to show how to get the red lipstick look of your dreams in four steps.
https://youtu.be/fb8HXJn-2Sc
While all of our lipsticks promise long-lasting colour, these tips will help you prolong your lip look while learning how to shape and define according to your natural lip line.
Step one: MOISTURIZE, APPLY FOUNDATION & SET
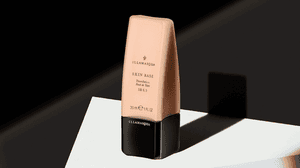
Always moisturize your lips before applying lipstick. This step is especially important if you’re using a matte red lipstick. Once you’ve moisturized, blend foundation around the lip line. The final stage of prep, set your lips with a light veil of Loose Powder to create a smooth base that will prevent colour bleeding and help your lip look last.
Step two: APPLY YOUR LIPSTICK
Generously apply lipstick directly from the bullet to the centre of the bottom lip. Press lips together to transfer the colour. This will help save time and create your natural lip shape. Using our NEW Lip Brush, reapply lipstick to the upper and lower lips.
Step three: SHARPEN & SHAPE
Using our Colouring Lip Pencil, sharpen the edges of your lips starting at the cupid’s bow. Place the edge of the lip pencil on the lip line and gently trace until the lips are fully lined. Pro tip: for fuller lips, draw slightly outside the lip line. To minimize lips, draw inside the lip line.
Step four: SET YOUR LOOK
If you’ve built up too much product, use a tissue to blot lips, removing any excess product and reducing the opportunity for colour bleed.
What’s even better? This tutorial can be applied to any lip colour. If you’re a fan of more neutral shades and colours, the above steps will help you achieve a super long-lasting lip look in the true shade of your favorite lipstick. Shop the look below.


